Quite frequently, I am contacted by students, that want to use LaTeX for the creation of there academic papers or (bachelor or master) theses, but struggle with the setup of a working LaTeX environment. Thus, I want to use this article to give an introduction to the LaTeX environment that I use personally. This article covers the setup of the following tool chain:
- TeX Live (link - version installed on my machine: TeX Live 2016) - very popular LaTeX distribution that brings along a huge number of packages.
- Visual Studio Code (aka VS Code - link - version installed on my machine: 1.22.2) - rather lightweight but very powerful IDE that brings great extendability for a vast variate of different languages.
- LaTeX Workshop (link - version installed on my machine: 5.3.1) - extension for Visual Studio Code that aims to provide all-in-one features and utilities for LaTeX typesetting (list of features can be found here).
Please understand, if you have a running environment that makes sense to you - stick with it! It is by no means necessary to use the one poposed here, if you should be in one of my classes. Further, there are probably better environments out there.
However, I personally find this setup highly usable and efficient. This is due to the points that it is:
- available for all major operating systems
- light weight
- easy to use
- fully open source
- works for me…
If you want to give it a shoot, here is how to set it up:
Step 1: Install TeX Live
The project’s website describes TeX Live as: “an easy way to get up and running with the TeX document production system. It provides a comprehensive TeX system with binaries for most flavors of Unix, including GNU/Linux, and also Windows. It includes all the major TeX-related programs, macro packages, and fonts that are free software, including support for many languages around the world.”
It is available for all major operating systems. You will find how tos for installing it on your machine on the project’s website.
Remark: Different Versions Available? Go Full!
Depending on your operating system, TeX Live may be available in different versions, each bringing a different set of packages. I would recommend to go for a full installation, as this will prevent any trouble with missing packages later. As an example, for Fedora 27, the full installation package is called texlive-scheme-full and is available for installation from the standard repositories by using dnf. For Ubuntu the package’s name seems to be texlive-full according to this. For Windows the installer will ask for the kind of installation it is supposed to do.
Here is an overview of links to install tutorials per operating system:
Linux Setup
If you are using Linux, it is very likely that you can install Tex Live though you standard package manager. I have checked the following distributions, and for them this seems to be true:
- Ubuntu: link
- Fedora: link
- I use it myself. Even though the link above only refers to a old version, a newer one is available in the Fedora repositories.
- Arch Linux link However, according to a co-worker, some distributions ship very old versions of TeX Live e.g. Fedora brings Te Live 2016 even though the 2018 version is available at the time of writing). In this case it may be beneficial to install it manually (However, so far, I have not had any issues with the old version, yet).
If Tex Live should not be available for your distribution, please review the following two links:
Windows Setup
If you are using Windows, you can simple install Tex Live by following the instructions given here. The installation is really simple. It basically consists fo starting an installer and following though the installation. During the installation the installer will download all available packages and set them up on the system. I tested it out of curiosity and it worked perfectly on my Microsoft Windows 10 virtual machine.
MacOS Setup
If you are running on MacOS it is recommended to use the MacTex redistribution of Tex Live as it includes Mac-specific utilities and front-ends. It is also pre-configured to work out-of-the-box with macOS as it provides sensible defaults for configuration options that, in TeX Live, are left up to the user to allow for its cross-platform compatibility [wikipedia].
An installation manual can be found: here. It seems to be very straight forward.
(Please understand, I have never used MacOS and don’t have/don’t want access to a machine running it. Thus, I have not tested it :D)
Step 2: Install Visual Studio Code
Visual Studio Code is a light weight IDE developed by Microsoft that is open source. It offers great ability to be extended with new functionality though a extension system. Still it remains easy to use and lean.
Operating system specific installation guides can be found here:
If you want to get familiar with VS Code, the following will give you an introduction on basic editing: link.
Step 3: Install the VS Code extension: “LaTeX Workshop”
In order to be able to edit LaTeX with VS Code, you need to install an extension. The one I use and recommend is called LaTeX Workshop.
The installing procedure is the same on all operating systems. Simply follow these steps:
- launch VS Code Quick Open (ctrl/cmd + P)
- paste the following command: “ext install James-Yu.latex-workshop”
- hit enter
- after the installation, it is most probably necessary to restart VS Code (I know… Microsoft…)
At this point you are probably all set and can create LaTeX documents with your machine. However, if you want to verify that everything is set up properly, you may want to execute the following step es well.
Step 4: Verify everything is set up properly
In order to verify, that everything is set up properly, I recommend using the research proposal template that I host on my GitHub account.
Step 1: Clone the repo on to your local machine
Use the git client of your choosing to clone the repository locally. Using the console client, the command is:
git clone git@github.com:stefantruehl/research-proposal-template.git
Optional: in order to be able to see later, if the pdf if properly generated, I recommend deleting the researchproposal.pdf-file at this point.
Step 2: Open the researchproposal.tex-file with VS Code
Follow these steps:
- Open VS Code
- Open Folder (“File”->”Open Folder”), browse to the location where you cloned the repository and open the research-proposal-template folder.
- In the explorer section of VS Code’s UI open the researchproposal.tex-file
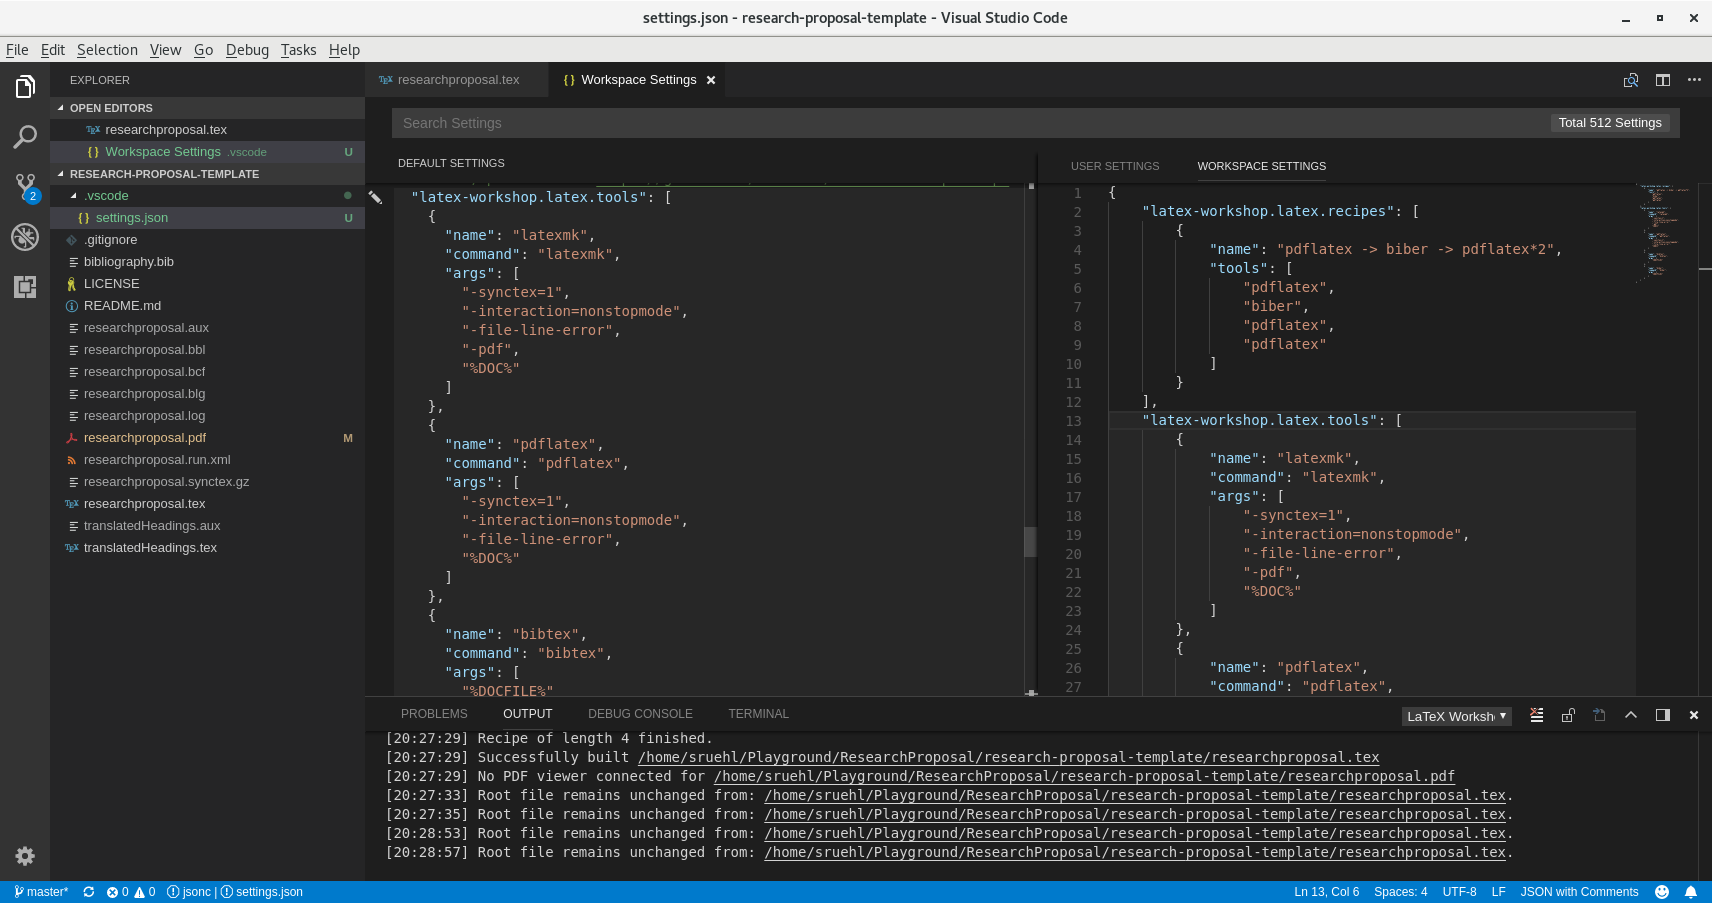
Step 3: Setup necessary Workspace Build Settings for the Research Proposal
The research proposal has been set up the way that it requires Biber as bibliography information processing tool. Thus, it is necessary to adjust the build recipe that LaTeX Workshop uses to generate a pdf.
In order to do that, follow these steps (screenshot below):
- Open the settings: “File”->”Preferences”->”Settings”
- For the setting latex-workshop.latex.recipes add a workspace setting as listed below.
- For the setting latex-workshop.latex.tools add a workspace setting as listed below.
The following is the full content of my workspace settings.
{
    "latex-workshop.latex.recipes": [
        {
            "name": "pdflatex -> biber -> pdflatex*2",
            "tools": [
                "pdflatex",
                "biber",
                "pdflatex",
                "pdflatex"
            ]
        }
    ],
    "latex-workshop.latex.tools": [
        {
            "name": "latexmk",
            "command": "latexmk",
            "args": [
                "-synctex=1",
                "-interaction=nonstopmode",
                "-file-line-error",
                "-pdf",
                "%DOC%"
            ]
        },
        {
            "name": "pdflatex",
            "command": "pdflatex",
            "args": [
                "-synctex=1",
                "-interaction=nonstopmode",
                "-file-line-error",
                "%DOC%"
            ]
        },
        {
            "name": "bibtex",
            "command": "bibtex",
            "args": [
                "%DOCFILE%"
            ]
        },
        {
            "name": "biber",
            "command": "biber",
            "args": [
                "%DOCFILE%"
            ]
        }
    ]
}
Step 4: Build pdf-file
Once you have added the workspace settings, return to the editing view of the researchproposal.tex-file.
Choose the item “Build LaTeX project (Alt+Ctrl+B)” from the context menu. Now a pdf should be generated.
If so, congrats you got it running. Enjoy!
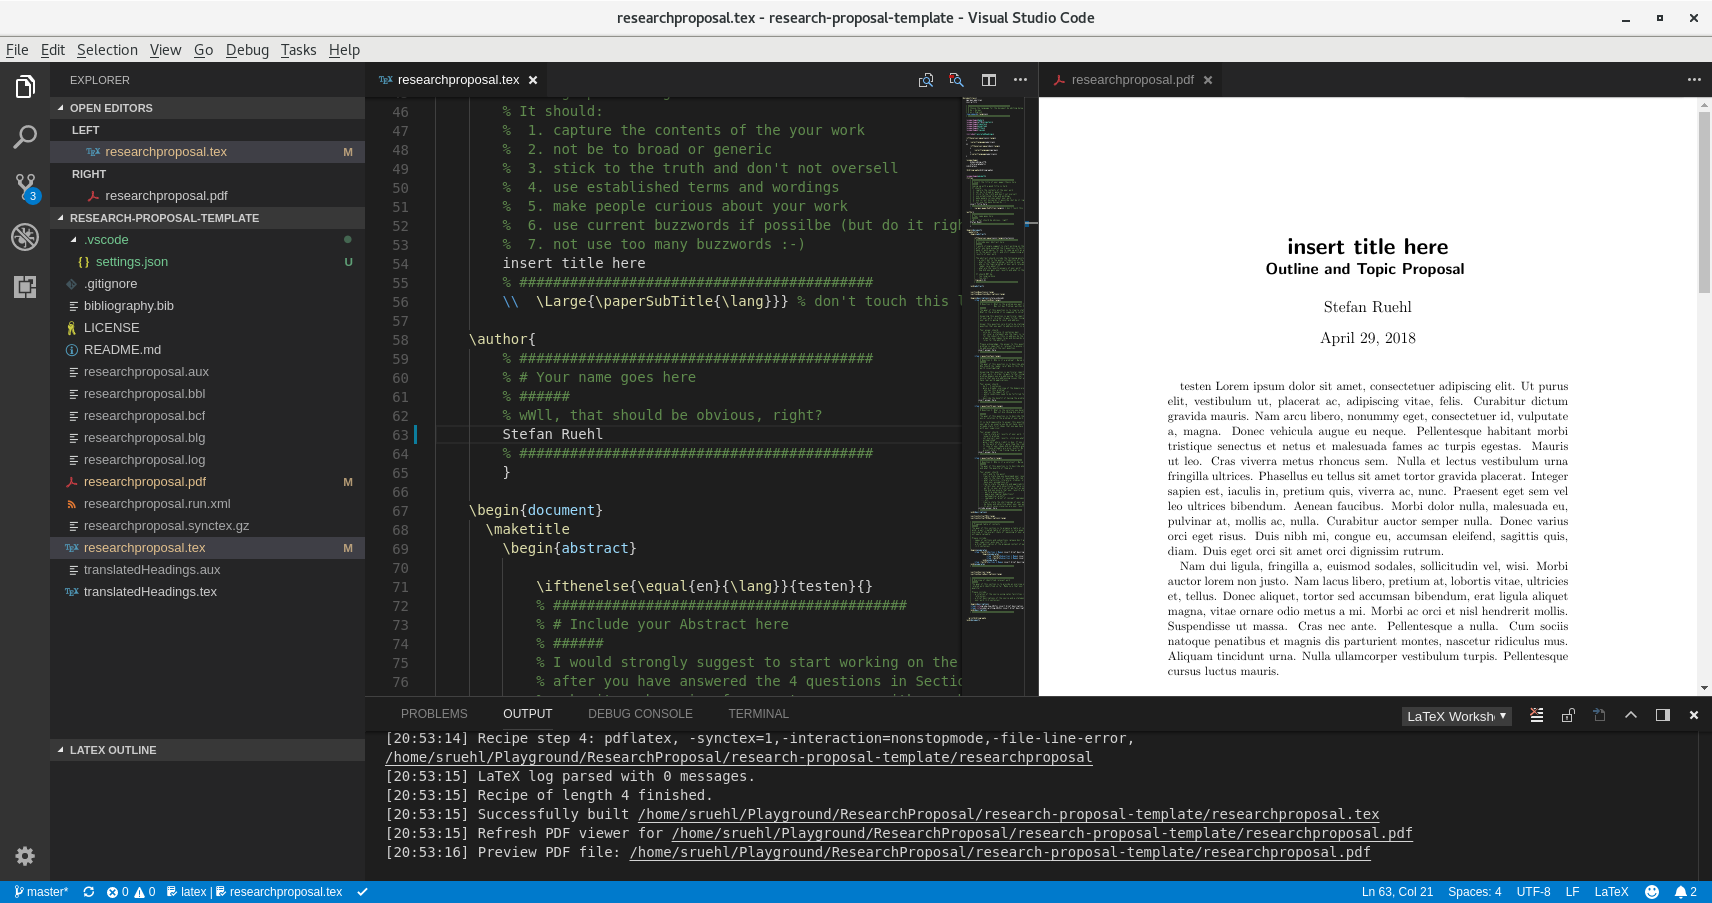
Bonus Point: Open Preview on the Side
Personally, I use the preview on the side feature as it gives me the ability to see what to document I am editing in in (semi) real-time. Screenshot below.
In order to open this, click the “Open Preview to the Side (Ctrl+K V)”-icon on the top right corner of the edit window that shows the researchproposal.tex-file.